Design Brief
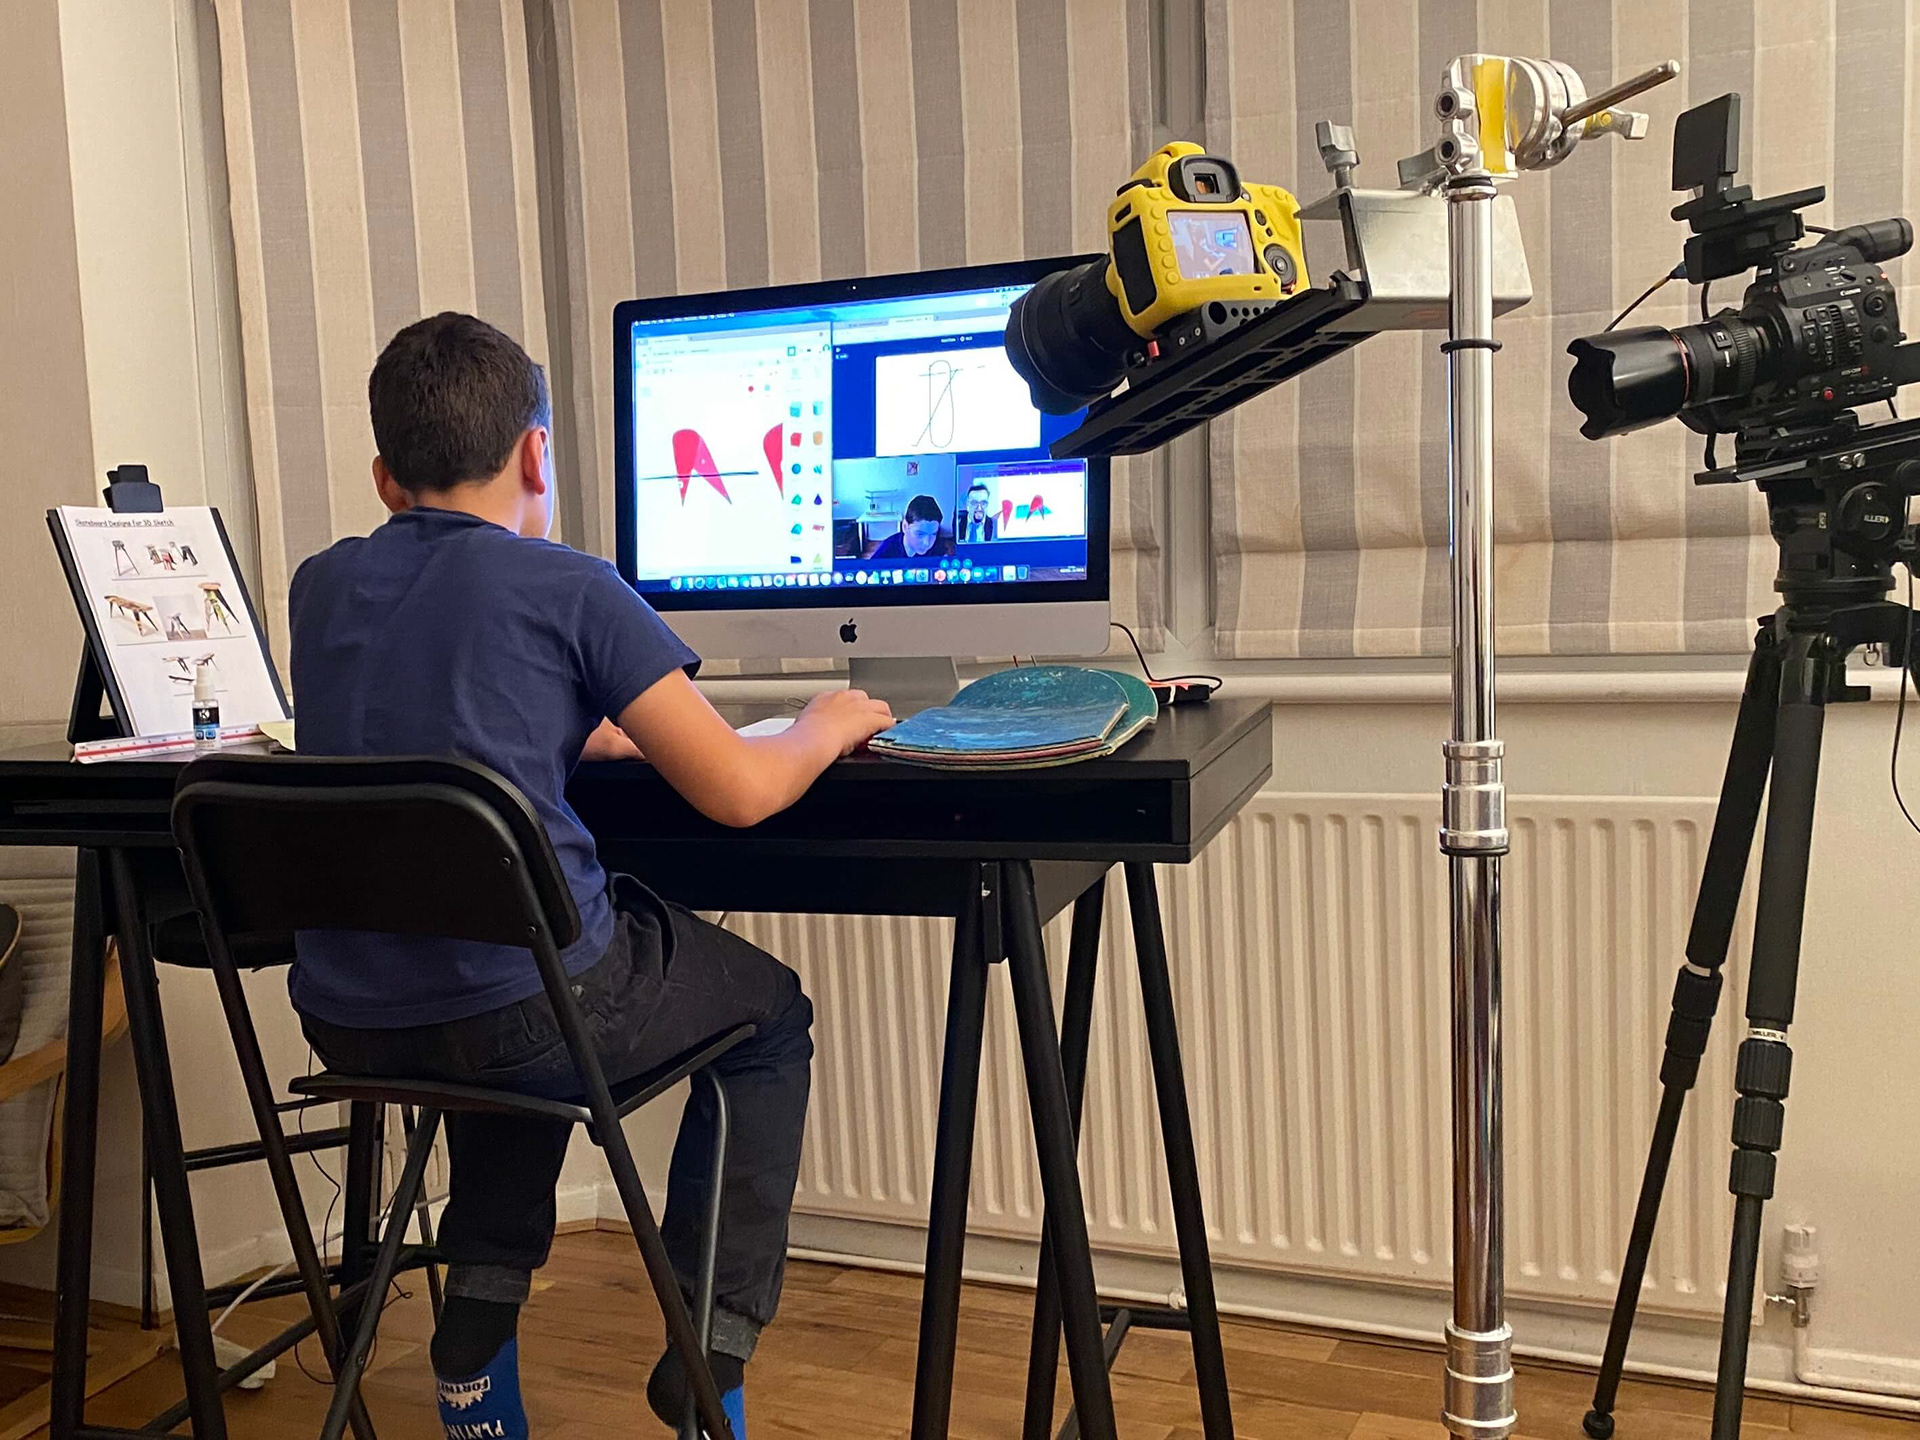
Brilliant Labs, Atlantic Canada, asked my brother and me to be part of a community TV series about young people, coding and the environment. We were given the challenge to use their awesome b.Board to monitor air quality and think about the environment around us. We were paired up with Rohan from Canada, who is 14 - the same age as my brother. They are both very techy.
I have decided to design and build one of my up-cycled skateboards into a stool and Femi and Rohan will hack some air quality sensors, which I will incorporate into the design. It's a transatlantic collaborative project. The design needs to be easily copied as there has been a lot of interest from the maker/coding community to develop this into a project to get young people engaged into making, coding and thinking about the environment.
Broadcast of segment: December 2020 [Nova Scotia - Canada]
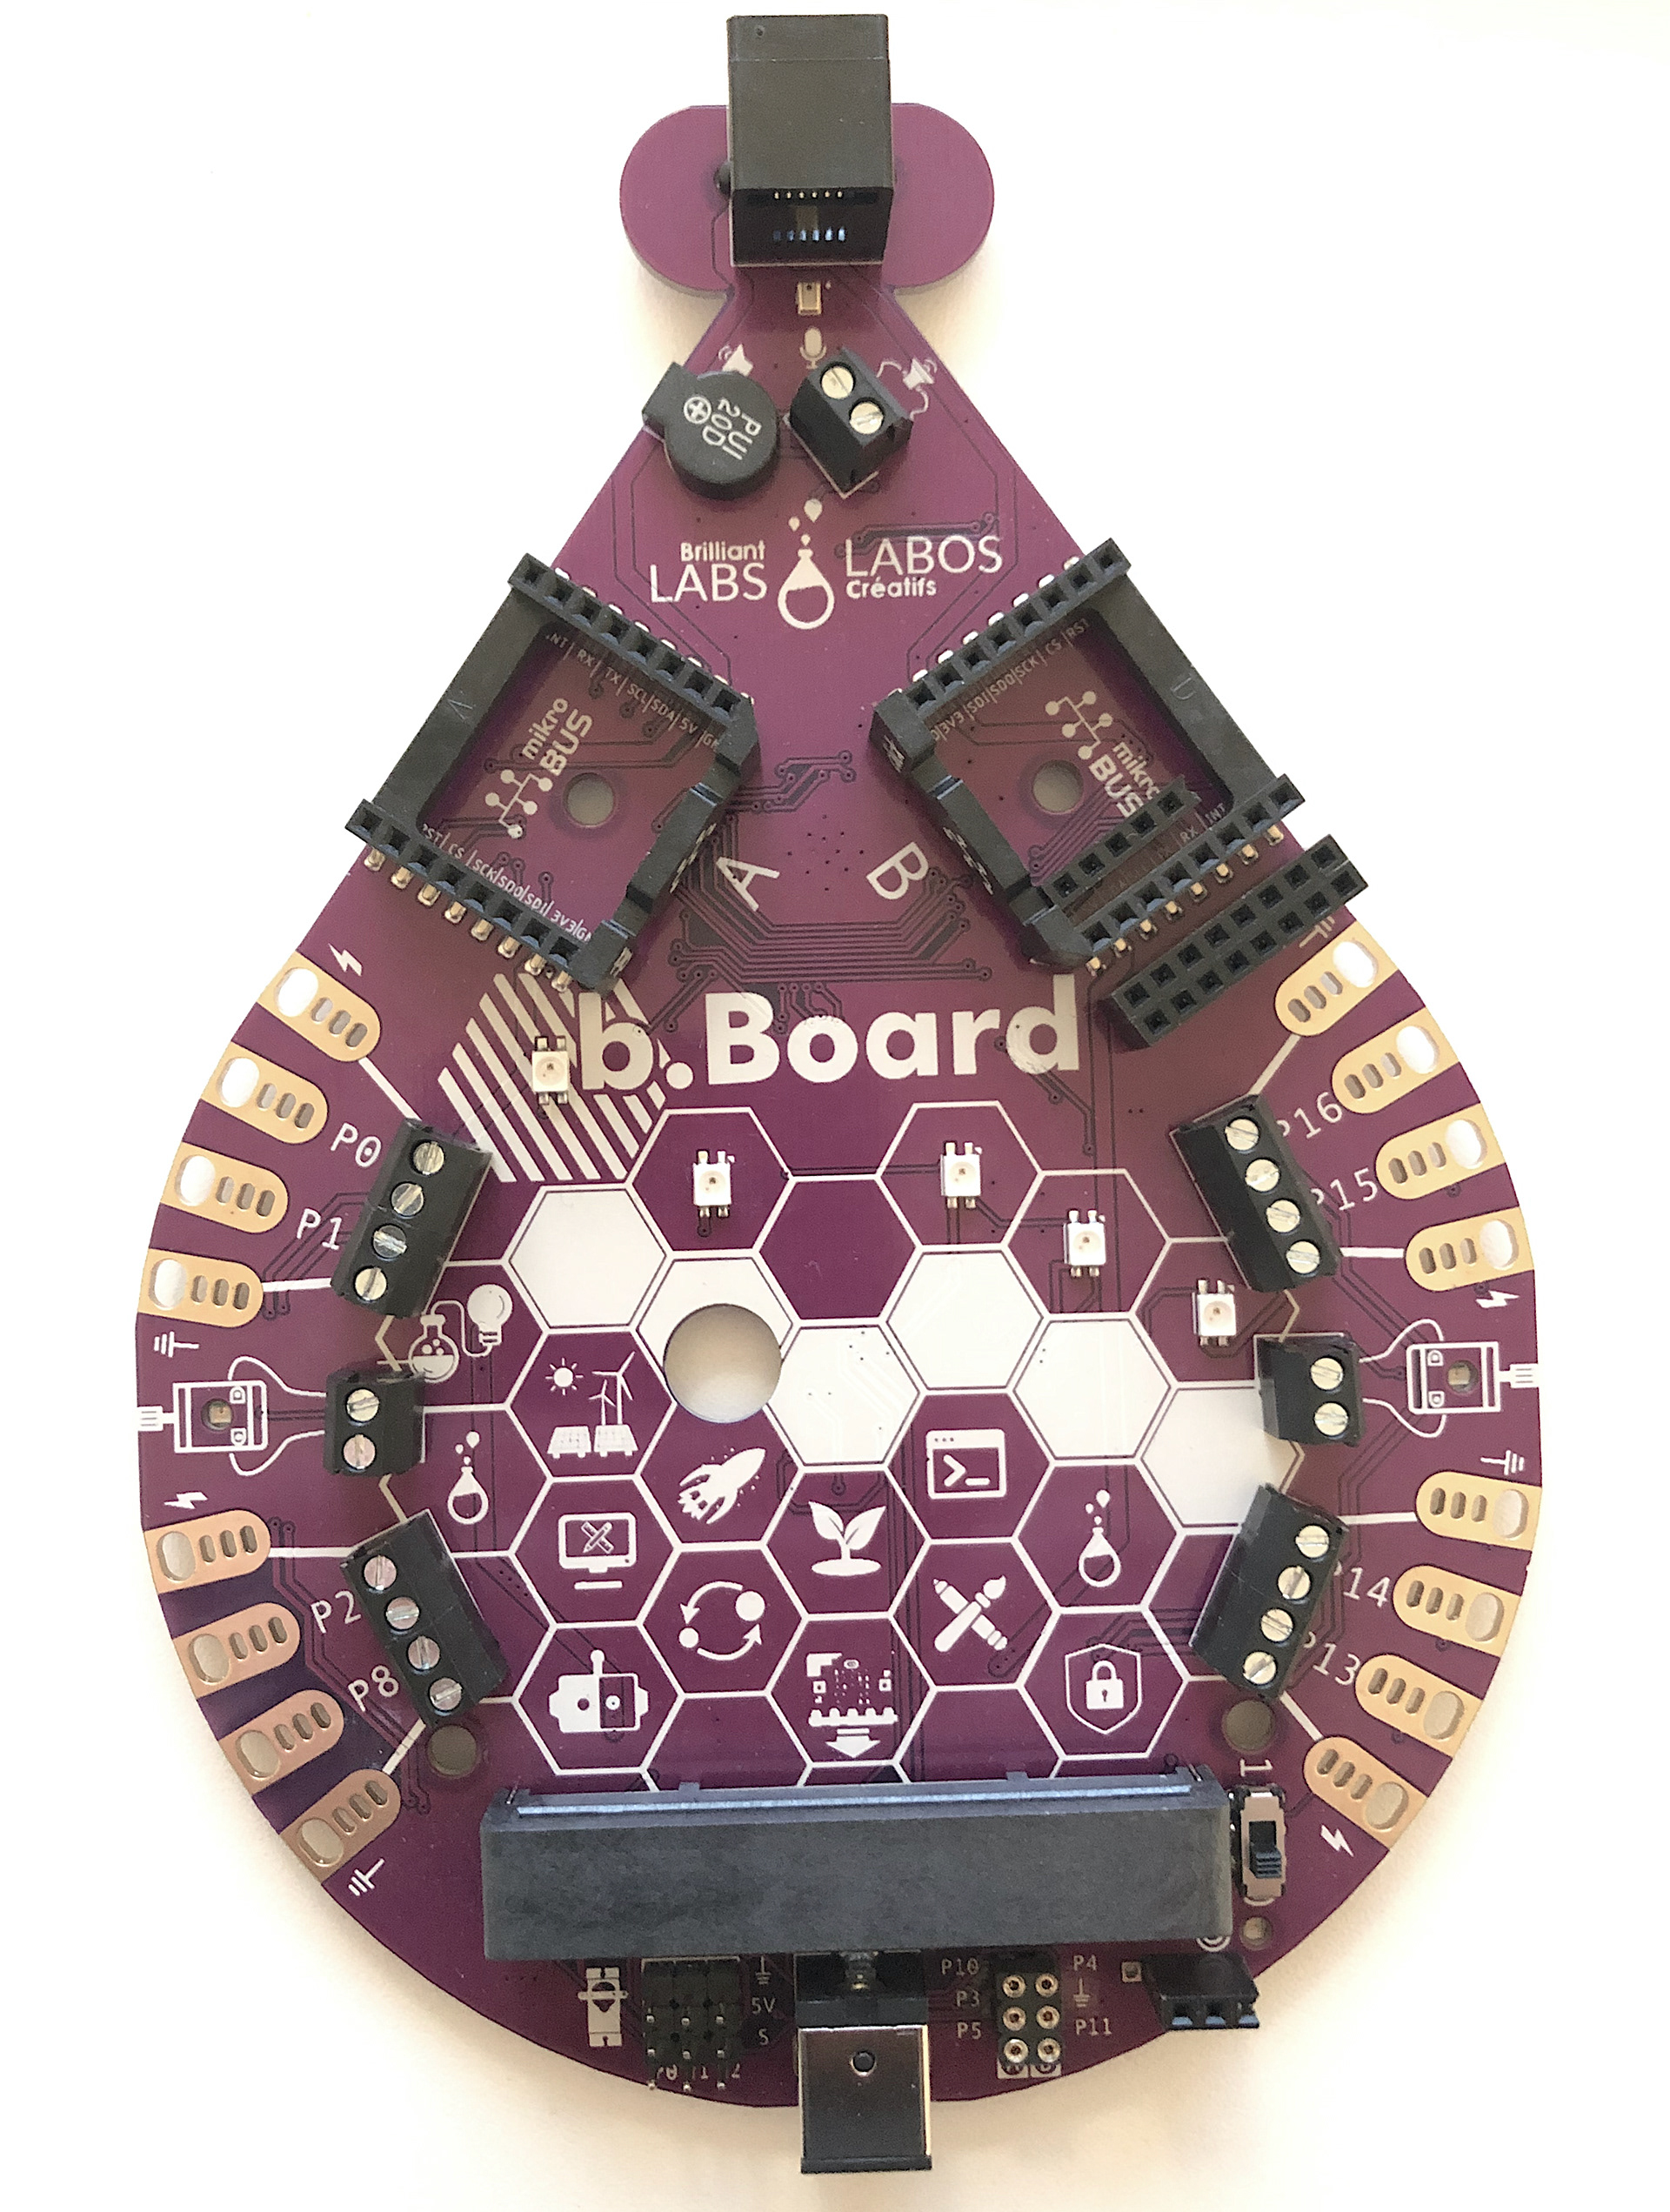
The b:Board
Design Specification
Aesthetic:
Makes use of skateboard shape and curve at each end
Shows off vibrant colours and designs on the bottom of skateboards
Shows off multicolour cross section of skateboards
Urban graffiti / street style
Natural aesthetic
Street community vibes
Cost:
Skateboards are up-cycled: free
Made from 2-3 skateboards maximum
Cost of nuts / bolts / screws: £5
Cost of batteries: £3
Cost of sensors: tbc
Cost of removing adhesive from skateboards: £8
Time taken to make it: 3- 5hr
Customer:
Teenagers
Skaters
Urban youth
Young professionals
People interested in pollution and the environment
Parents into fashion / design
Environmental:
Using non-permanent fixtures so can be undone and up-cycled once again
Utilises old, used skateboards
Will use standard sized skateboards, nuts and screws
Adhesive from skateboards not environmentally friendly
Use re-chargeable batteries
Recycling of sensors {?)
Size:
Width of one skateboard
Must be high enough for it to be a stool to sit on rather than a foot stool
Safety:
Must be strong enough to hold a persons weight
Should be level to prevent any drinks from spilling
Must ensure all edges are sanded and varnished to prevent splinters
Function:
Small stool for sitting on
Air sensors to monitor environment
Material:
Laminated veneers of maple wood (in most skateboards)
Steel (in nuts, bolts and metal rods)
Manufactured using power drill, hacksaw, hand saw, sand paper and metal file
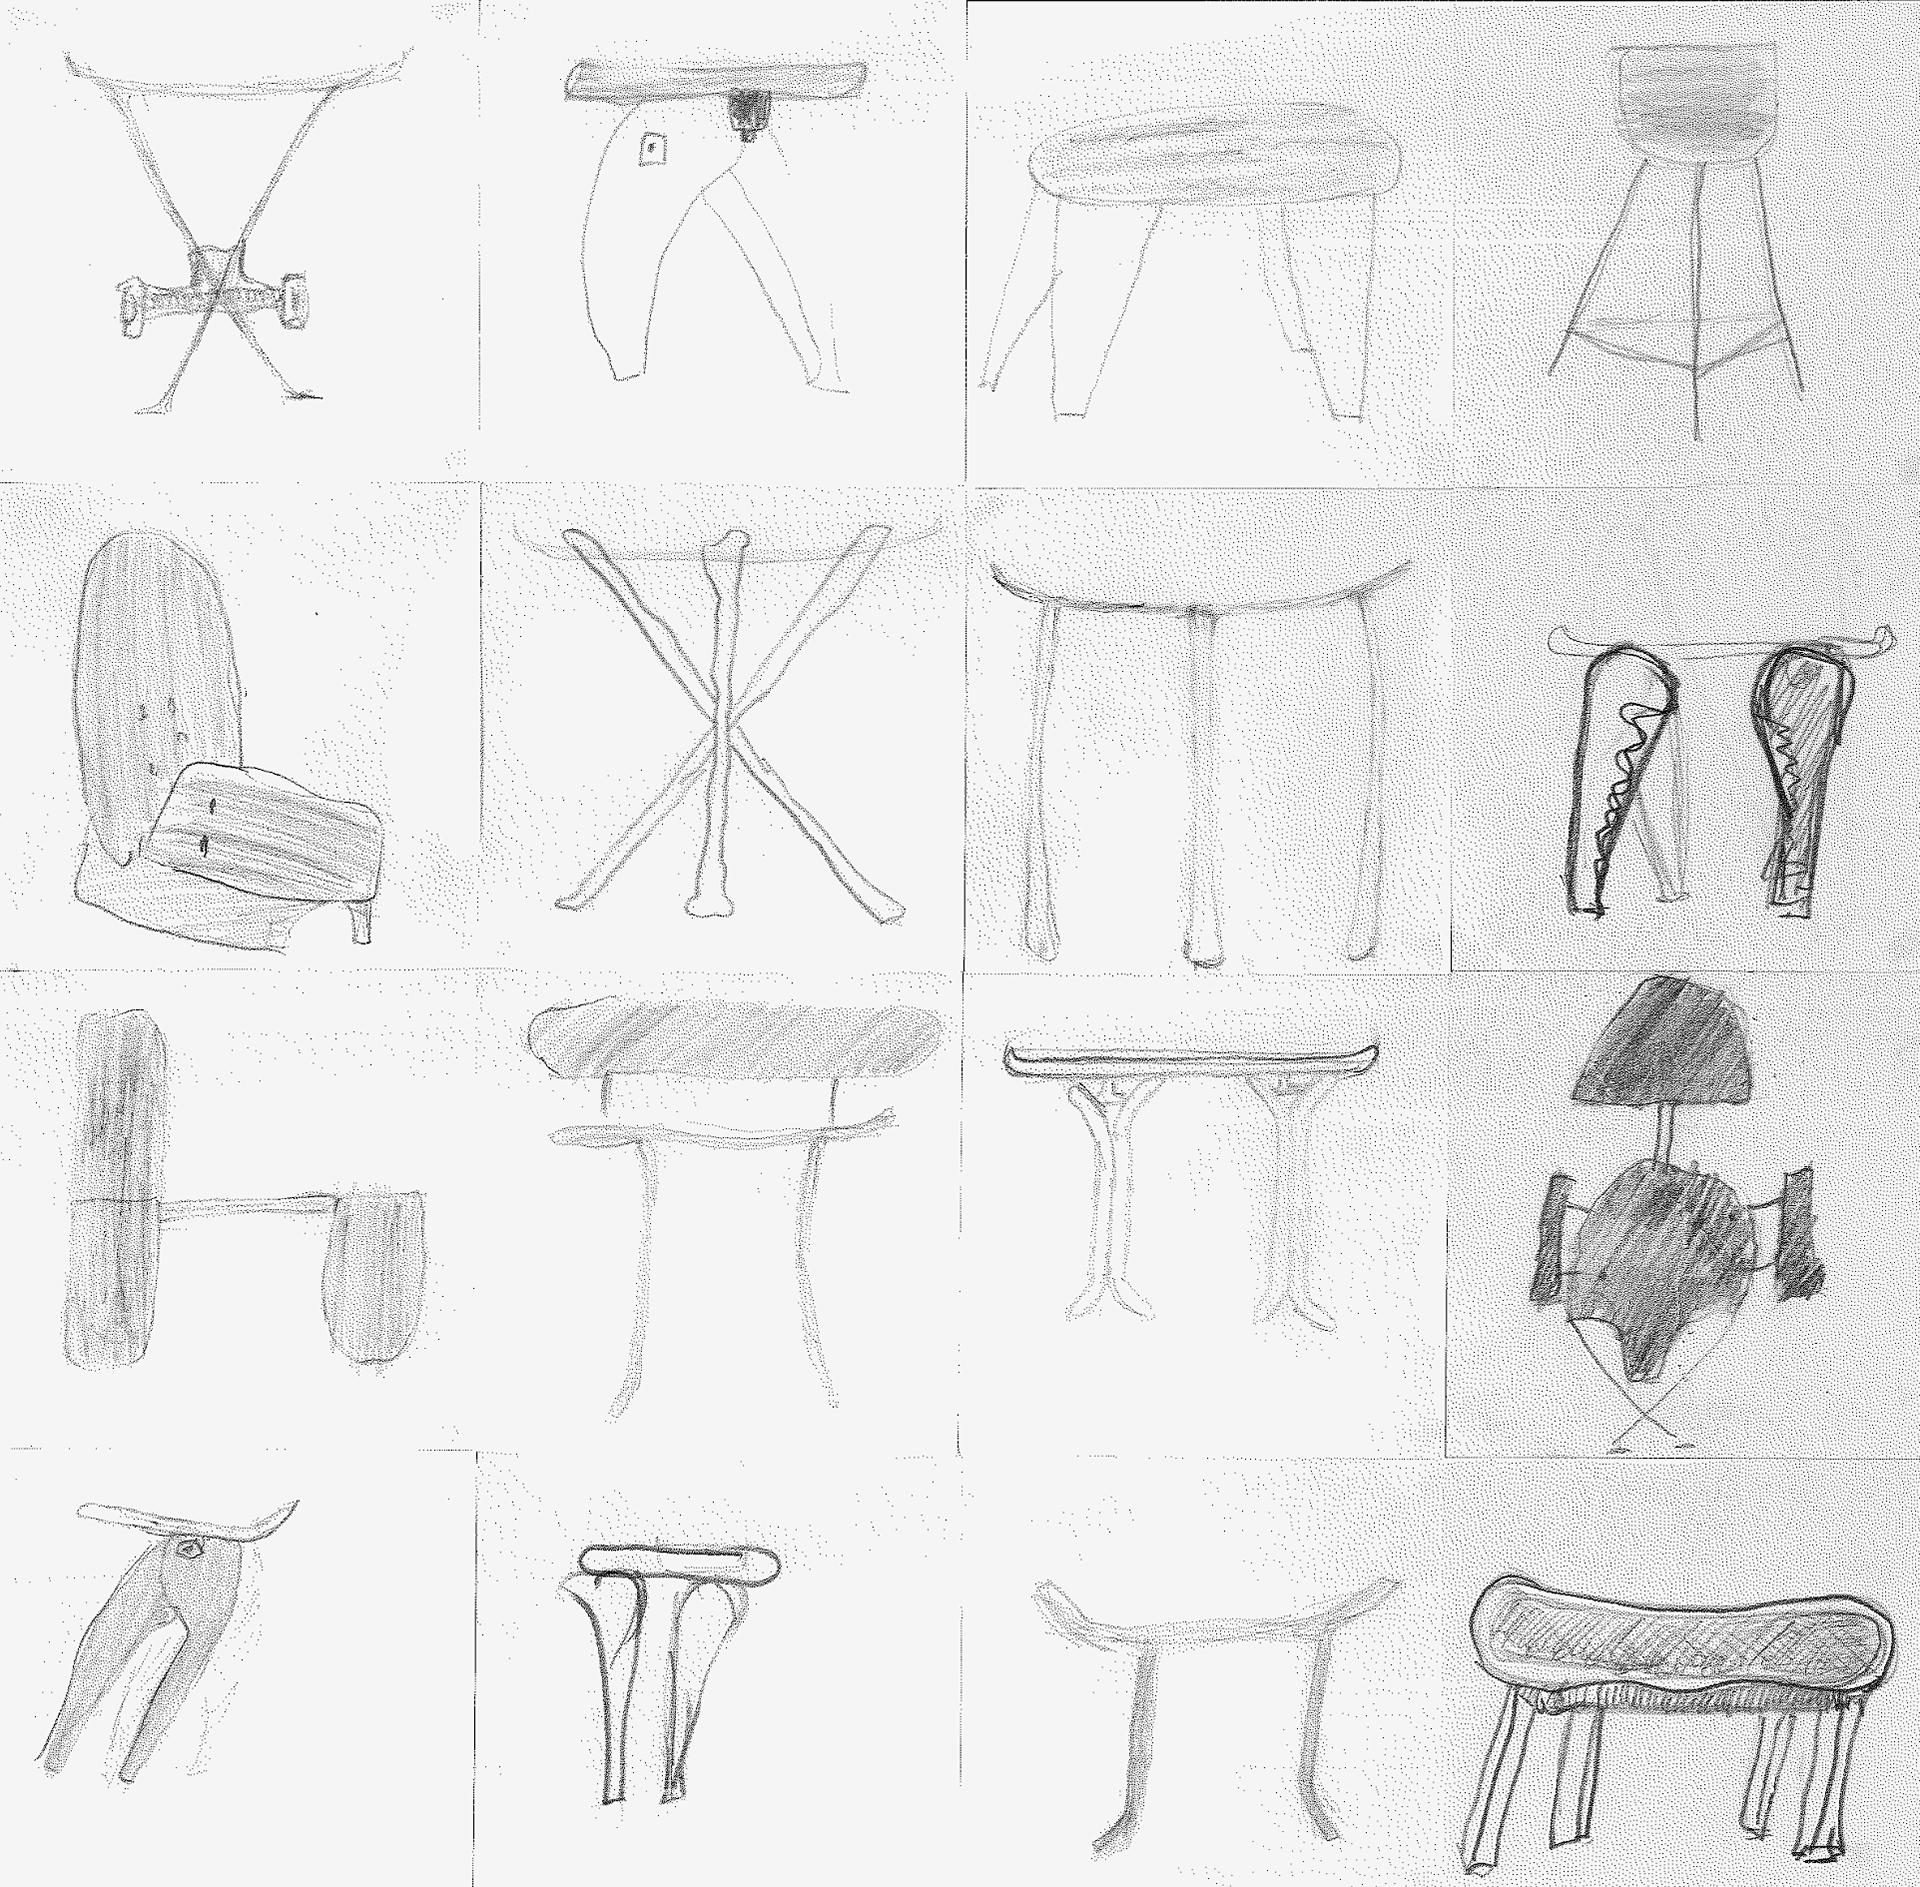
INitial Sketches
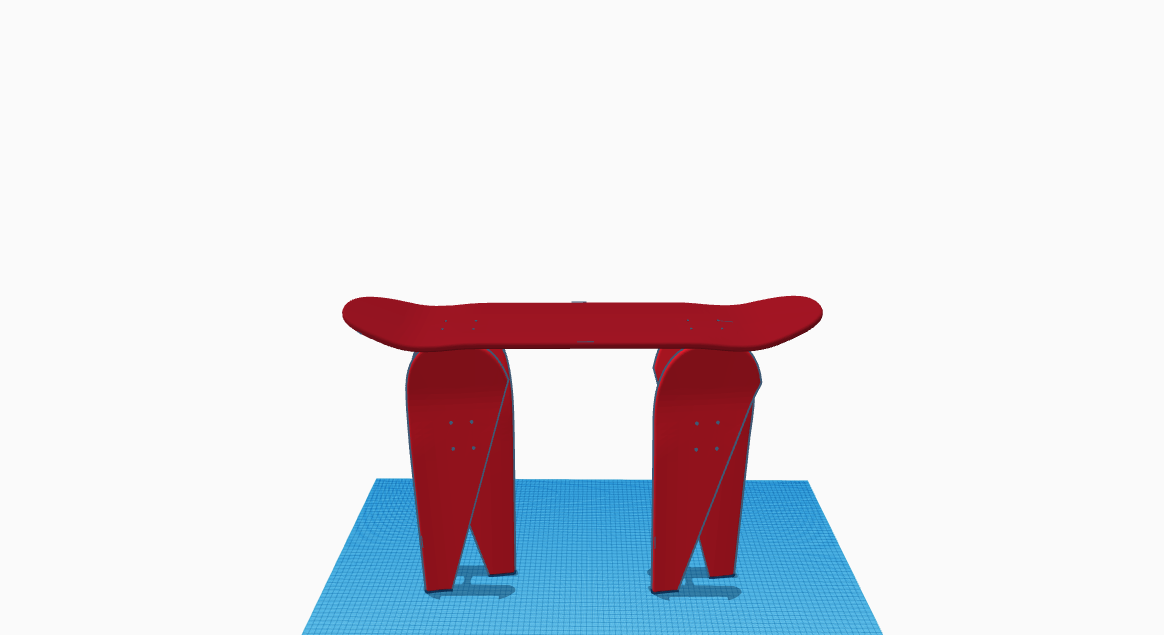
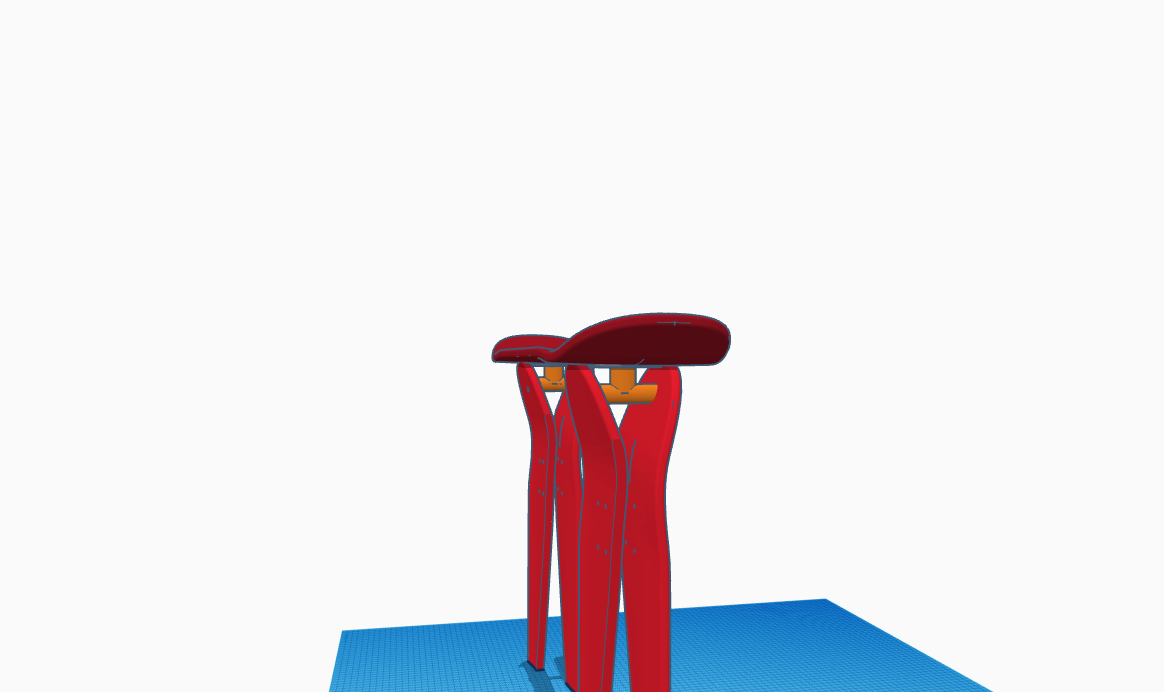
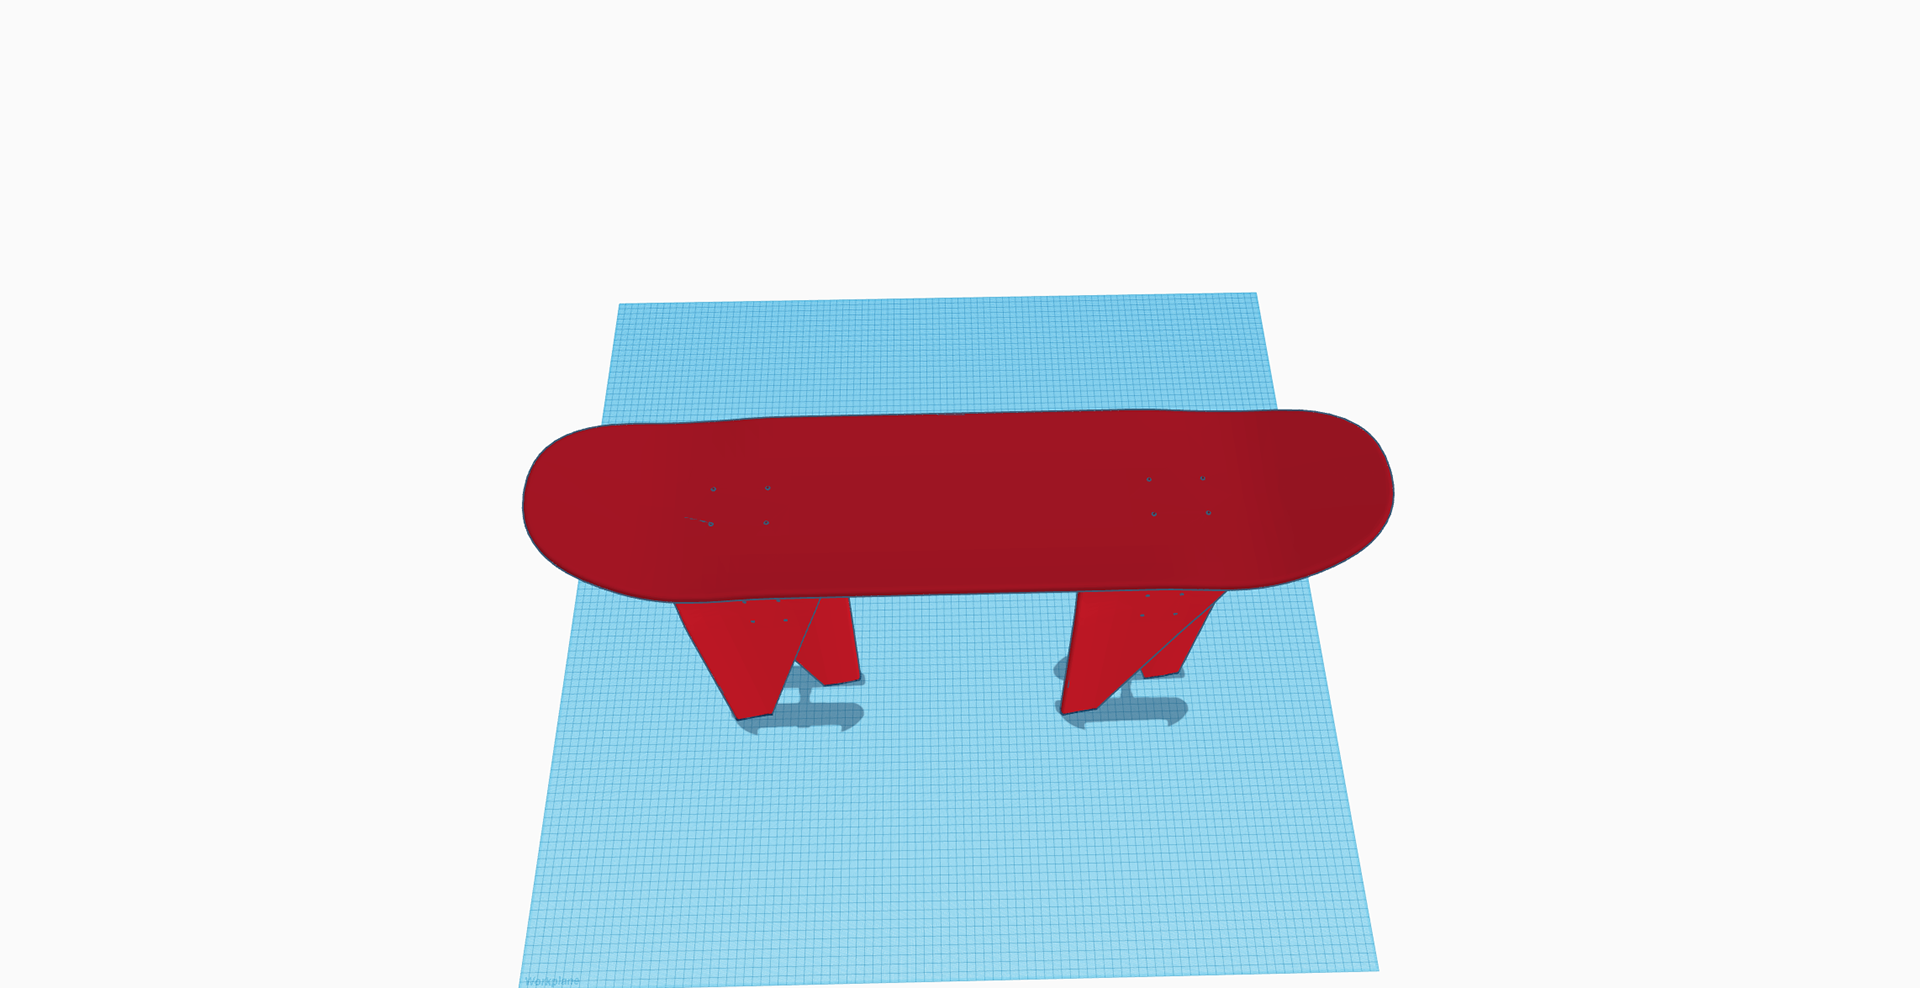
3D Design
(Made in TinkerCad)
Update of Work So Far
I have built a bedside stool with some of the old skateboards we collect in order to explore and get a feel of the material that I'm working on. I wanted to explore some features, such as the stability of the legs/supporting framework and how well the skateboards could be striped down and sanded. I wanted to explore which tools to use and think about how long tasks take. Finally I wanted to explore what secondary materials would look best and whether the final product could look, aesthetically pleasing.
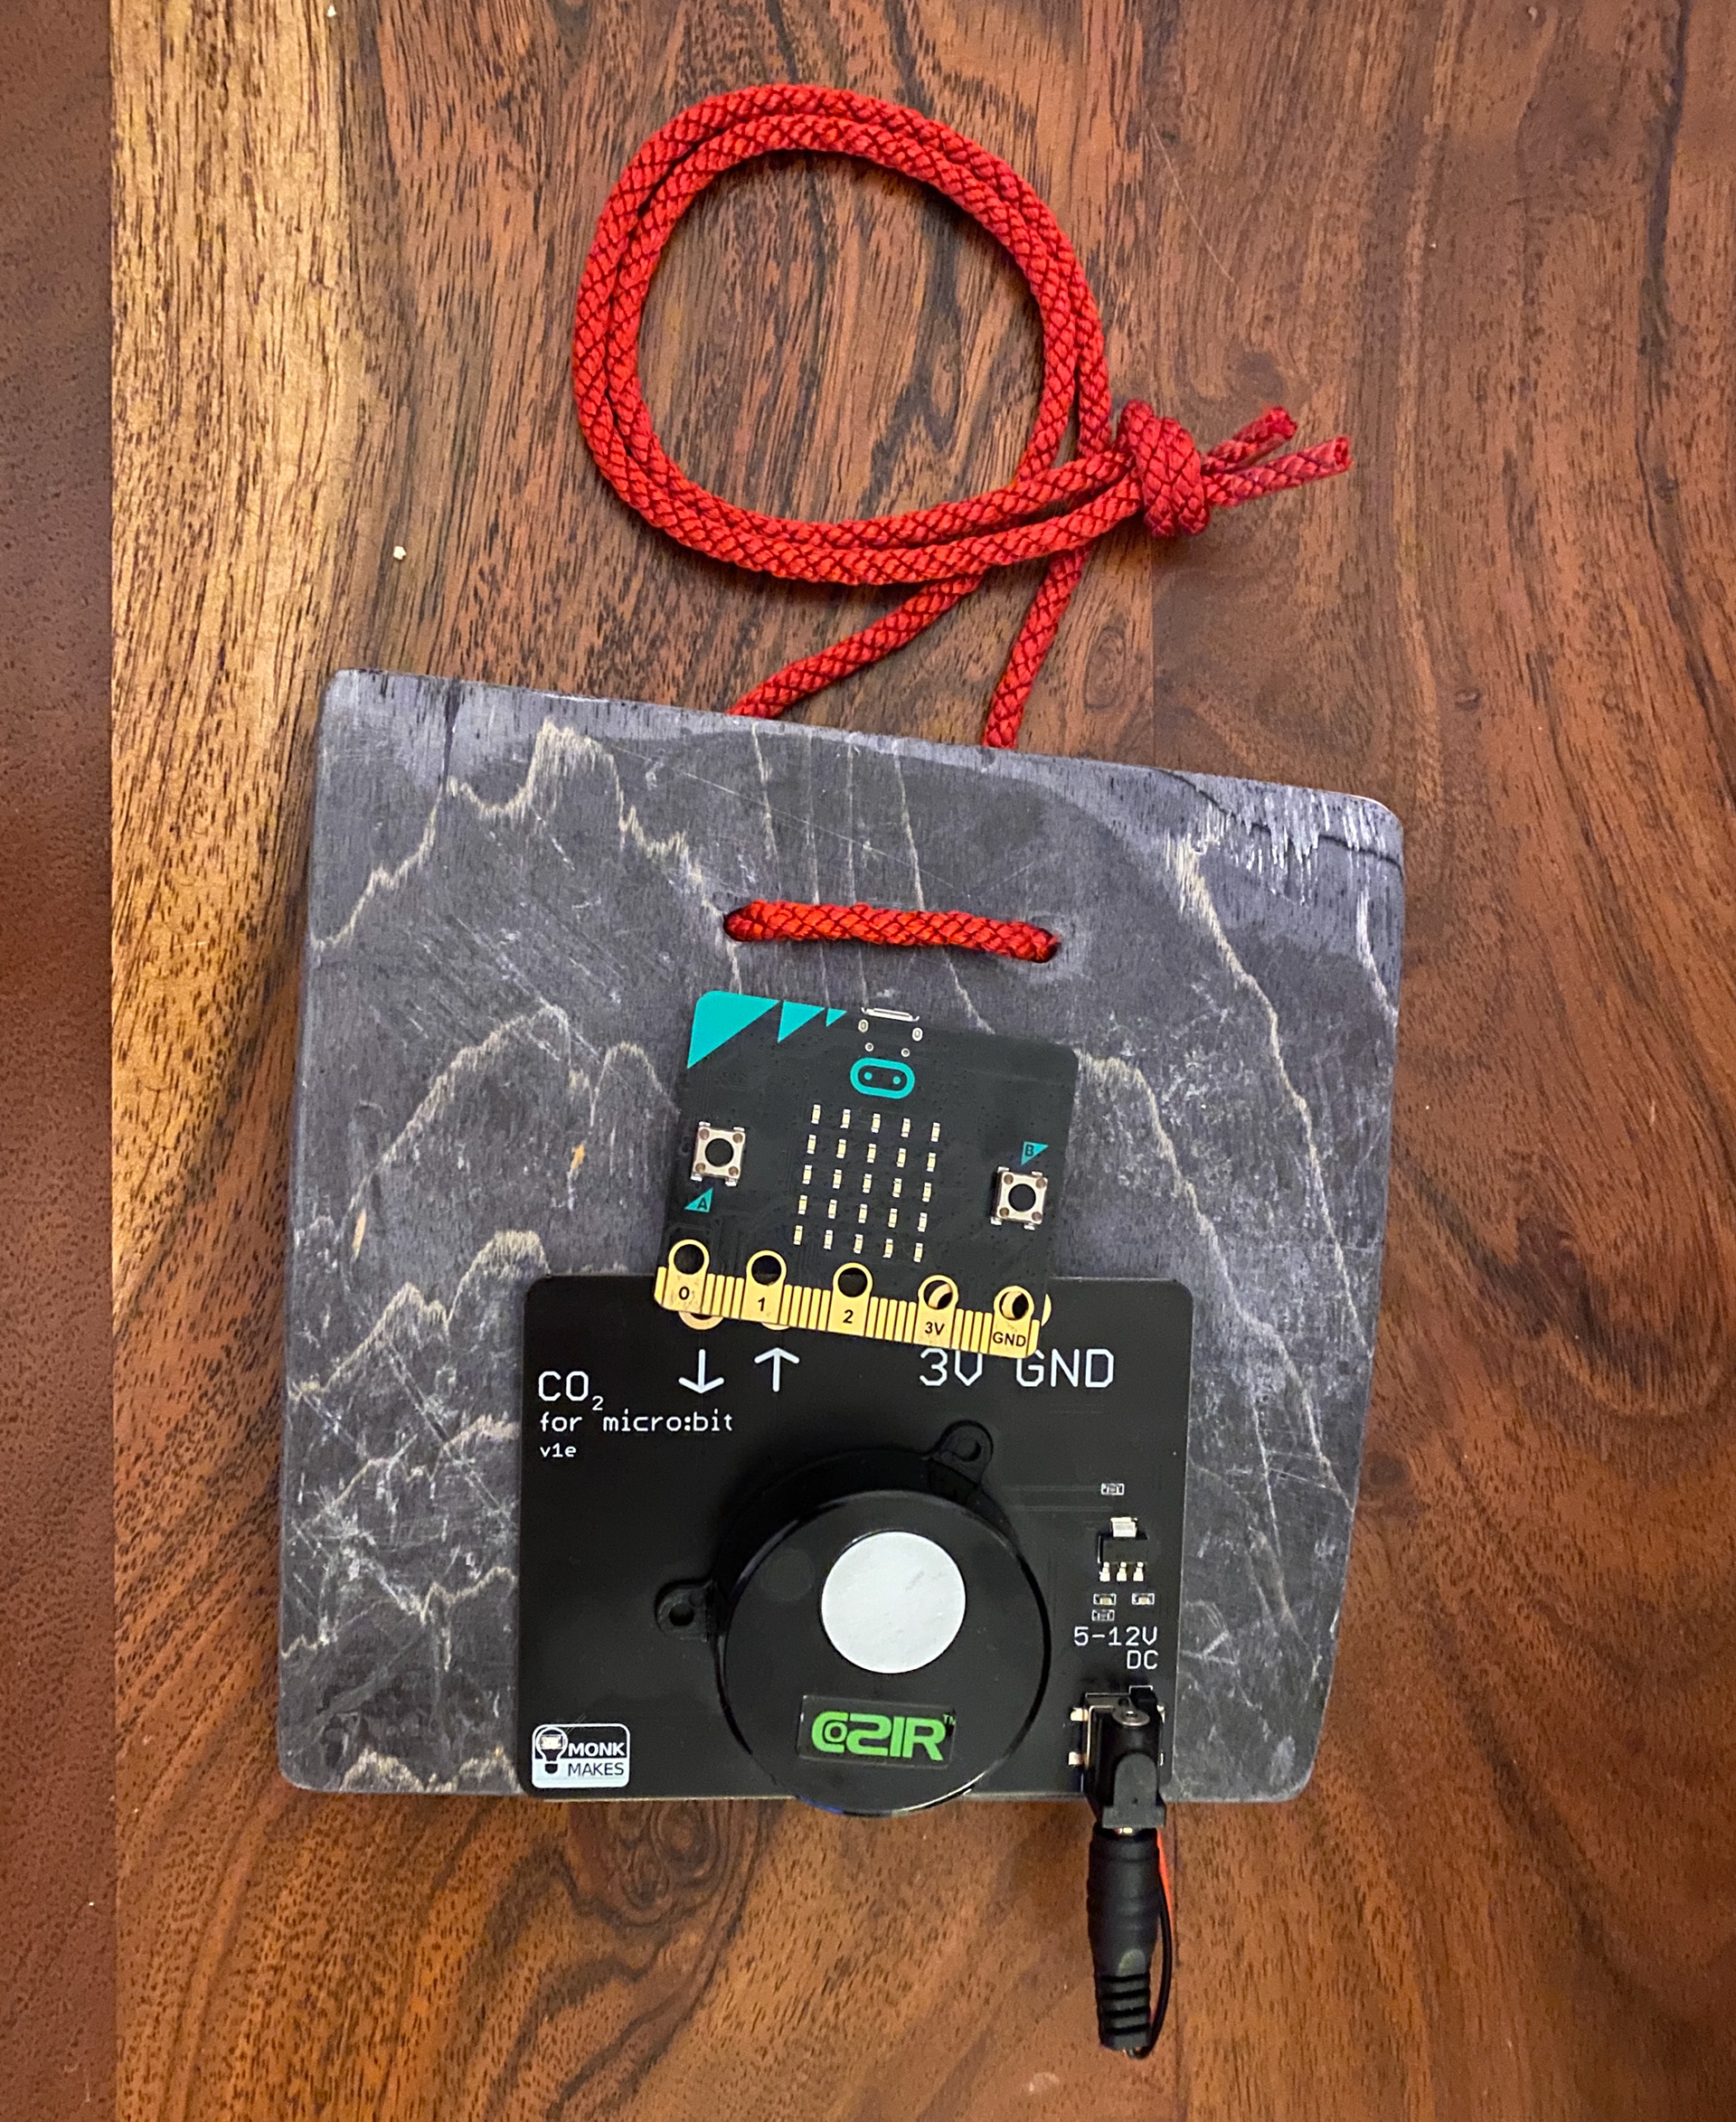
We are still awaiting a delivery of the b.Boards from Canada but in the meantime we have been supported by MonkMakes who have sent us their prototype PCB and sensors - which Femi has been testing and is building a data collector/visualiser using the Bitty Data Logger. I have been ideating how to add the sensors and microbit to the stool design. I cut out a really lovely square from one of the broken skateboards and will see how I can make it into a portable board for the sensors - I will use a laser-cutter to make a cover for the battery pack.
I'm really excited that, after some research and experimentation, we will probably use a CO2 air quality sensor and we think this will help people check to see if their room is well ventilated; an important consideration for making sure they are Covid-safe. We are looking at the PM2.5/10 sensor to help people with asthma - to monitor their living environments too. This project is still a work in progress.
Update 2: Prep session
Despite a further Covid lockdown, I managed to access our outside makerspace to use the 3D sketch to measure and cut out one of the legs. It was really straightforward; I scored some lines using masking tape and a Stanley knife and then used a hand saw to make the cut. The cut-off was used to see how the legs would be attached to the trucks of the skateboard -used for the seat of the stool. The curve at the tip of the skateboard leg needed to be cut off so there was a straight edge to anchor the leg. However, the rest of the curves and angles of the boards where still visible.


Update 3: Making The Stool
On the day of the build, I gathered all the boards, tools and any additional material together before starting. I began by striping the skateboard I was going to use for the seat and unscrewing the trucks from it. I then used the leg I'd already cut, as a template for the other legs before using a hand saw to cut the pieces. It was hard work! Next, I sanded the edges and used a sander to get a smooth surface for the seat. The hardest part was working out how to make sure the legs would be stable - we had to saw the tips of the skateboard so they fit squarely on the seat. Then I had to decide where to drill holes to attach the legs to the trucks so they were even. It didn't work out in the first attempt because I'd drilled one of the holes too low down on one of the legs. So I had to drill another hole close by - which was tricky and I had to use an extra wooden block to guide the drill to the right place. Once reassembled, it was time for the big test! Would it take my weight and would it even rest on all four legs.
It worked!
It took my weight and we discovered something really interesting; the movement in the trucks meant that, even if you put the stool on an uneven surface, it would adjust to be steady, especially if you are a heavier adult. I can also add the skateboard wheels back on if I want. A clever part of the build is that we used the functions of the skateboard to benefit the design. So, for example, I worked out that if you took out the inner and outer bearings from the wheels - you can use one of them to fit the legs onto the axle of the trucks. It's a great solution to fixing the seat of the stool and the legs together. It keeps the design of the stool inline with the skateboard aesthetics of the brief.
Now I will take it all apart; sand the legs down, add some varnish and stain the seat. I will get the Brilliant Labs logo as a vector file so I can laser-cut a stencil and then spray paint a sign along with my own logo. All in all it was a successful build and the whole design process made it so much more easy to build and I think the result looks very professional. The problems we faced on the build day were manageable and it was done within a three hour timeframe.
The TV Segment will be posted here when it has been completed.


Update 4
The Community TV piece has been put on hold for a while. I think the development of the new B.board's software has yet to do updated to the new microbit - which is required for sending multiple messages (data] to the cloud.
in the meantime, I've been working with Dermot, at our makerspace, to develop a new design for a small stool that can be made from one old skateboard. I will create a 3D design so others can copy it. I have been asked to run a workshop with Dermot for young people in Lambeth who don't usually get the opportunity to make things.
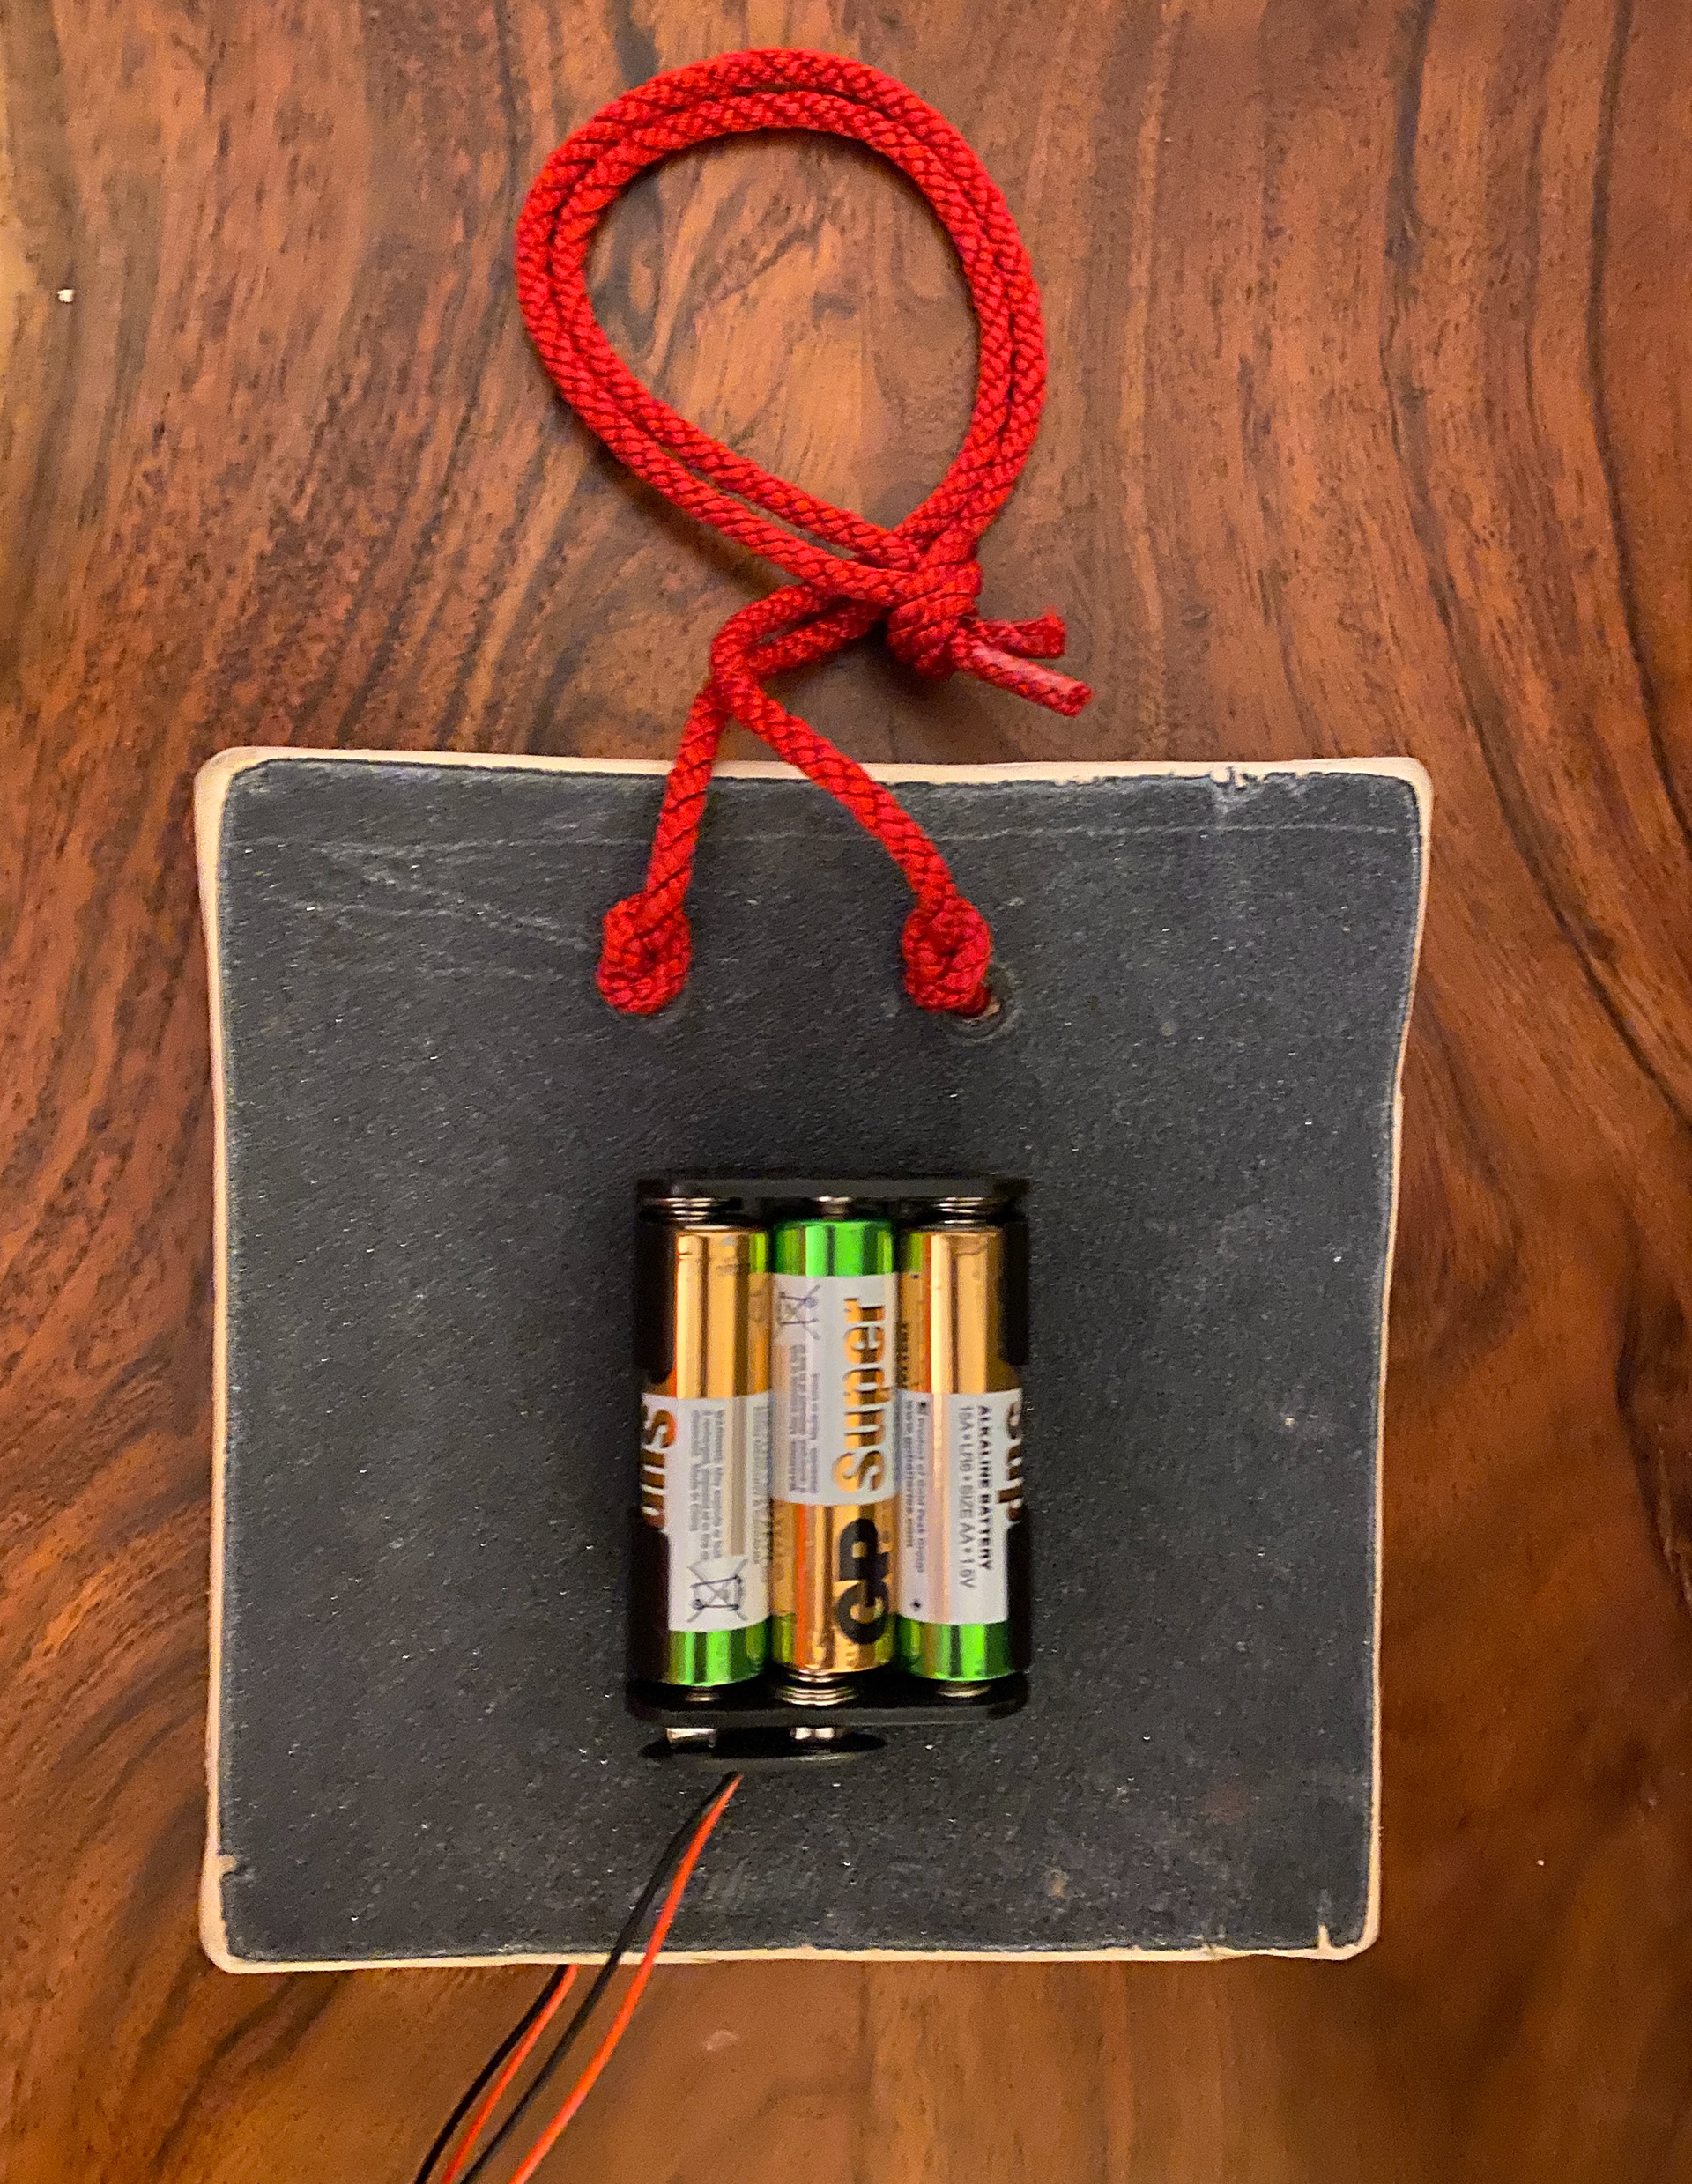
I made a chalk noticeoard with lights for my dad's Christmas present and have also designed a lamp for my mum - which uses the trucks to fit a light-fitting in it to turn it into a lamp. A CO2 sensor and microbit has been added so she can measure how much ventilation is in the room at night. So we going to test this out. At the moment there's a problem with the connections between the microbit and the sensor.

New design: Stool from one skateboard
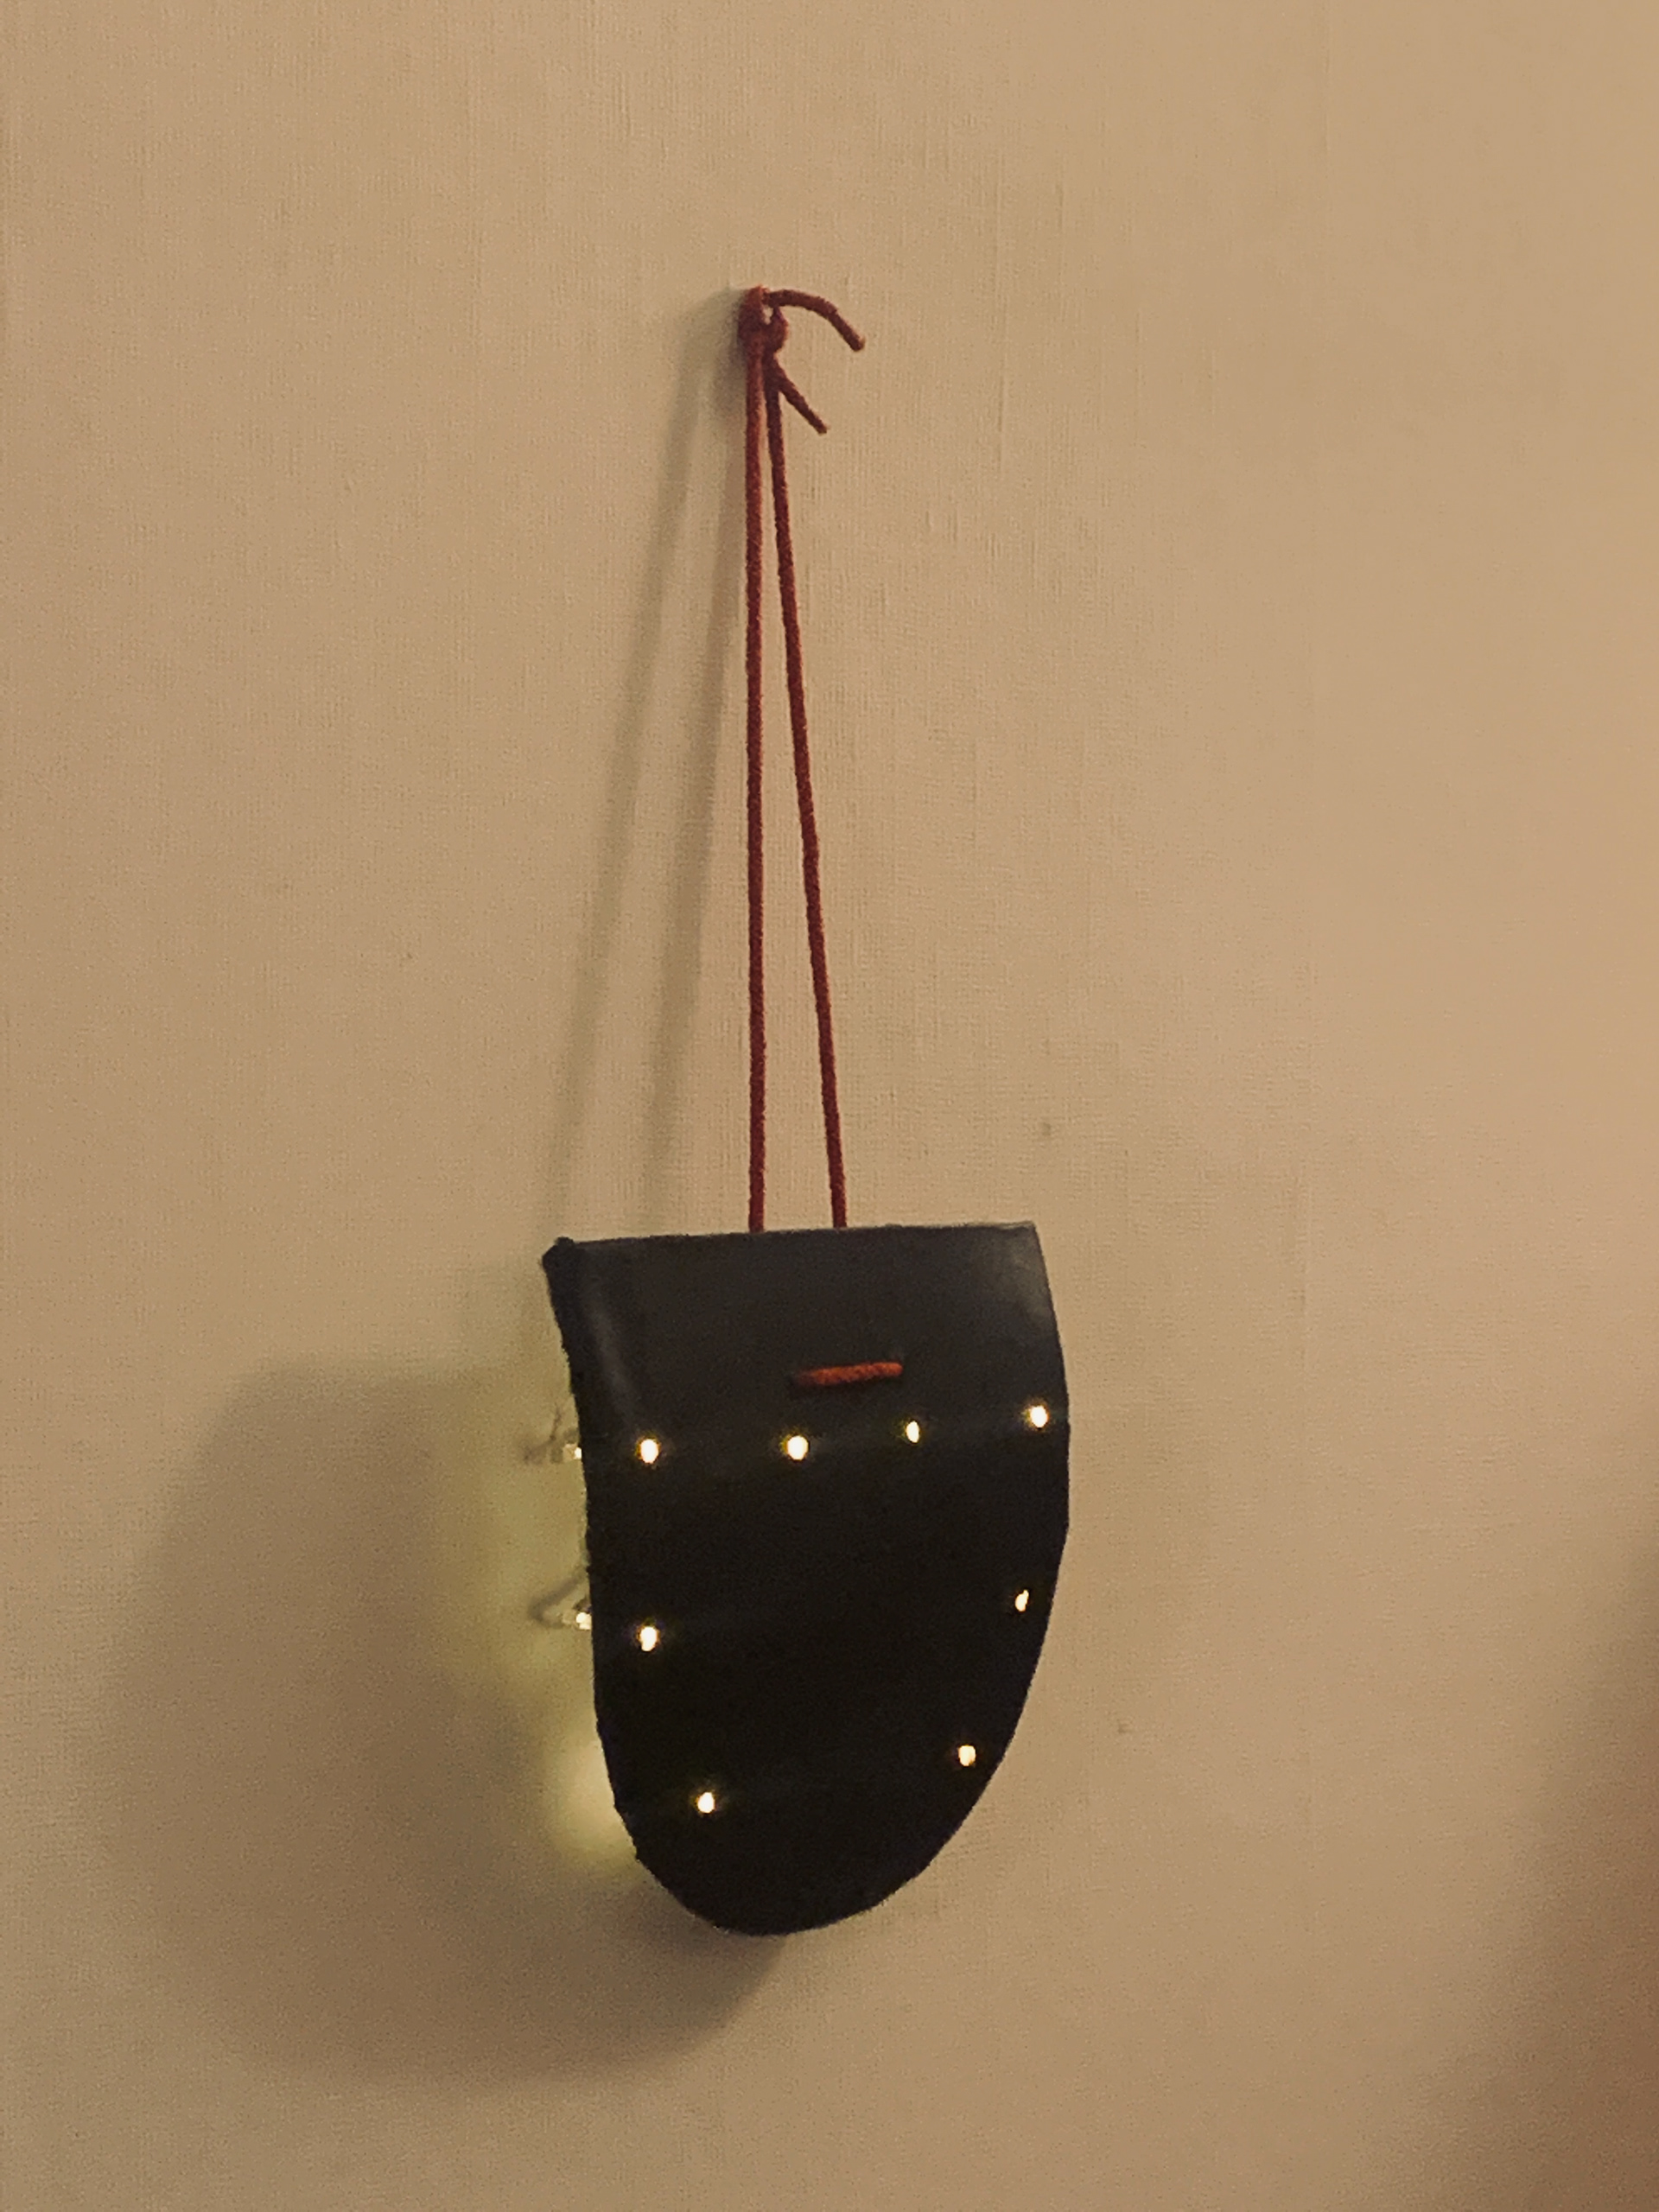
Chalk: Noticeboard with lights

Getting lamp fitting to fit in the truck of the skateboard

Materials for lamp

Proto-type of lamp

Proto-type of lamp
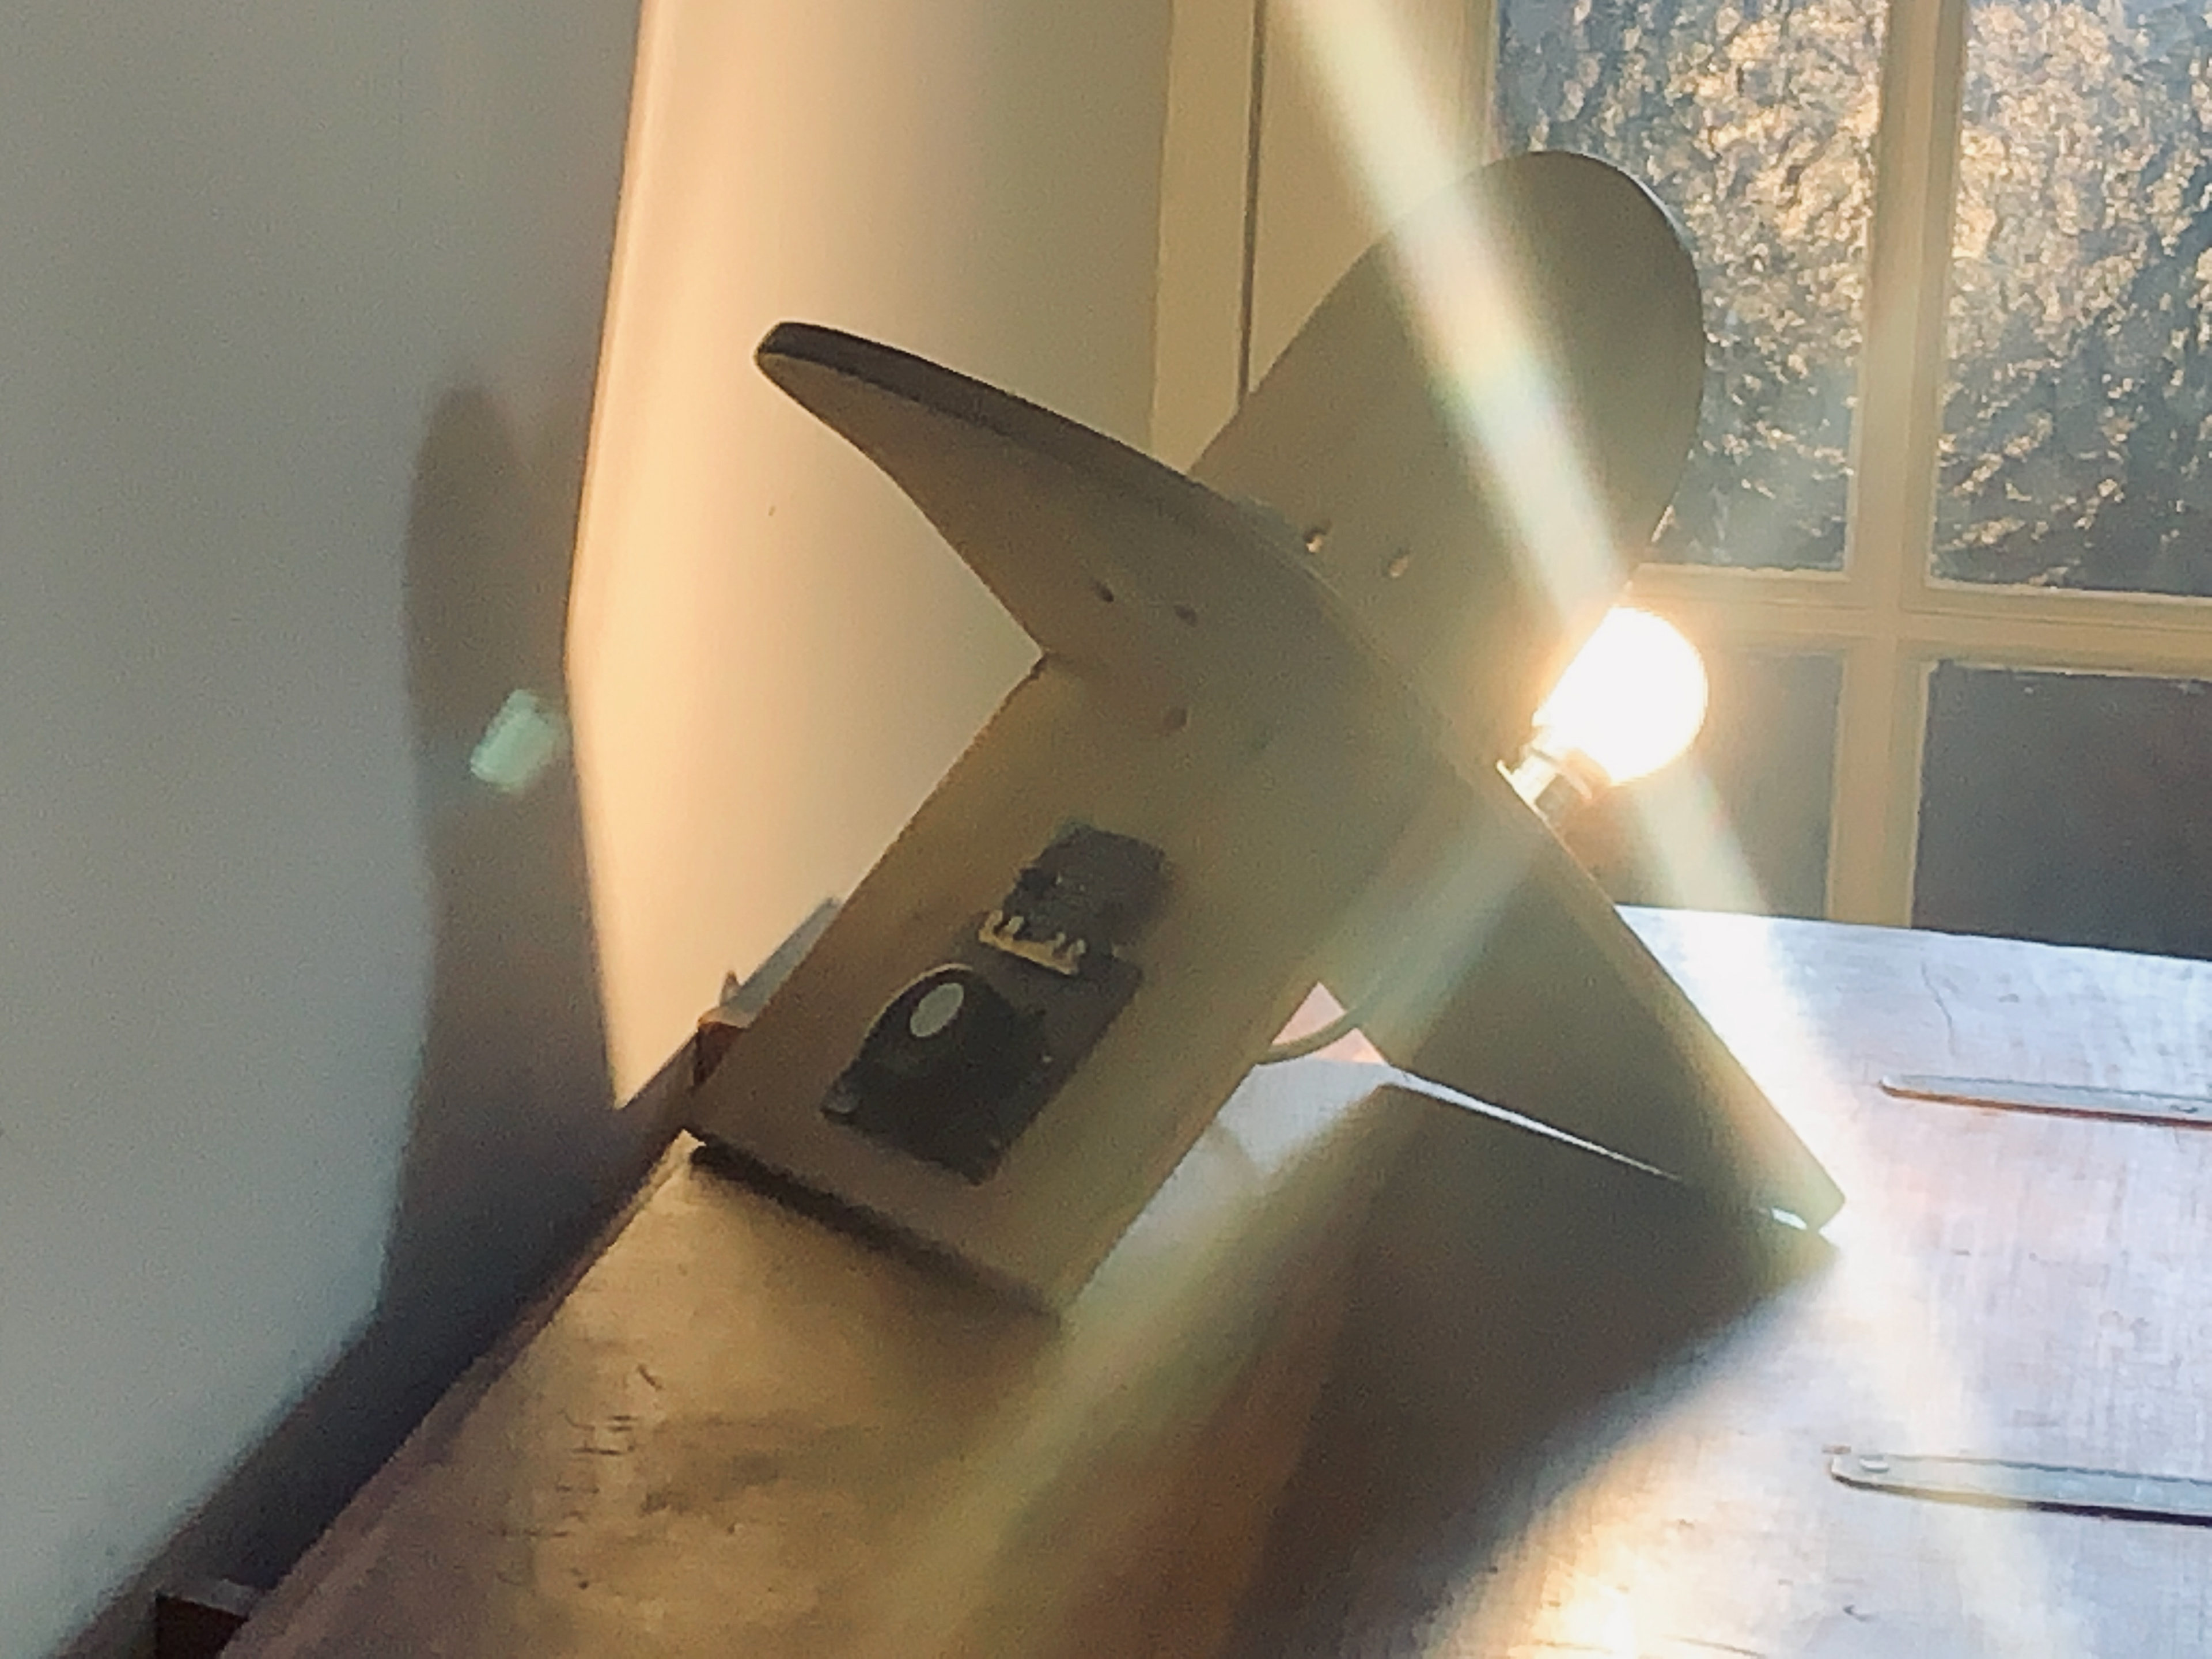
CO2 Sensor

Book shelf
Proto-type: Bedside bookshelf lamp and CO2 sensor